RSS is an abbreviation that has evolved into the following, depending on their versions:
• RDF Site Summary (also known as RSS 0.9; the first version of RSS)
• Rich Site Summary (also known as RSS 0.91; a prototype)
• Really Simple Syndication (also known as RSS 2.0)
Today, RSS stands for 'Really Simple Syndication', and it has the following 7 existing formats or versions:
• 0.90
• 0.91
• 0.92
• 0.93
• 0.94
• 1.0
• 2.0
RSS tools refer to a group of file formats that are designed to share headlines and other web content (this may be a summary or simply 1 to 2 lines of the article), links to the full versions of the content (the full article or post), and even file attachments such as multimedia files. All of these data is delivered in the form of an XML file (XML stands for eXtensible Markup Language), which has the following common names:
• RSS feed
• Webfeed
• RSS stream
• RSS channel
They are typically shown on web pages as an orange rectangle that usually has the letters XML or RSS in it.
RSS feeds can be used to deliver any kind of information. Some of these 'feeds' include:
• Blogs feed - each blog entry is summarized as a feed item. This makes blog posts easier to scan, enabling 'visitors' to zoom in on their items of interest.
• Article feed - this alerts readers whenever there are new articles and web contents available.
• Forum feed - this allows users to receive forum posts and latest discussion topics.
• Schedule feed - this allows users (such as schools, clubs, and other organizations) to broadcast events and announce schedule changes or meeting agendas.
• Discounts or Special feed - this is used to enable users (such as retail and online stores) to 'deliver' latest specials and discounted offers.
• Ego or News Monitoring - this enables users to receive 'filtered' headlines or news that are based on a specific phrase or keyword.
• Industry-specific feed - used by technical professionals in order to market, promote, or communicate with current (and prospective) customers and clients within their specific industries.
RSS feeds enable people to track numerous blogs and news sources at the same time. To produce an RSS feed, all you need is the content or the article that you want to publicize and a validated RSS text file. Once your text file is registered at various aggregators (or 'news readers'), any external site can then capture and display your RSS feed, automatically updating them whenever you update your RSS file.
RSS tools are useful for sites that add or modify their contents on a regular basis. They are especially used for 'web syndication' or activities that involve regular updates and/or publications, such as the following:
• News websites - as used by major news organizations such as Reuters, CNN, and the BBC.
• Marketing
• Bug reports
• Personal weblogs
There are many benefits to using RSS feeds. Aside from being a great supplemental communication method that streamlines the communication needs of various sectors, RSS tools and feeds can also have tremendous benefits in your business, particularly in the field of internet marketing.
RSS tools and feeds provide Internet users with a free (or cheap) and easy advertising or online marketing opportunity for their businesses. Below are some of the RSS features that can help make your internet marketing strategies more effective.
1. Ease in content distribution services. With RSS, your business can be captured and displayed by virtually any external site, giving you an easy way to 'spread out' and advertise them.
2. Ease in regular content updates. With RSS, web contents concerning your business can now be automatically updated on a daily (and even hourly) basis. Internet users will be able to experience 'real time' updates as information in your own file (such as new products and other business-related releases) is changed and modified simultaneously with that of the RSS feeds that people are subscribed to.
3. Custom-made content services. With RSS, visitors can have personalized content services, allowing them total control of the flow and type of information that they receive. Depending on their interests and needs, visitors can subscribe to only those contents that they are looking for (such as real estate or job listings).
4. Increase in (and targeted) traffic. With RSS, traffic will be directed to your site as readers of your content summary (or 1 to 2 lines of your article) who find them interesting are 'forced' to click on a link back to your site.
These are just several of the many things that you can do with RSS. The possibilities are endless, and they are all aimed at providing you with an effective internet marketing strategy for your business.
In the mean time, Good Luck on your journey to success…
OR if you would like to succeed immediately to create financial freedom working only 4 hours a week, check out www.secrets2internetfortunes.com
Selasa, 20 Januari 2009
Sabtu, 17 Januari 2009
Disable USB Ports
n Active Directory Users and Computers, open an existing GPO or create a new one and open it. Use the security settings of that GPO to specify which computers it affects.
In that GPO, go to Computer Configuration – Windows Settings – Security Settings – File System and create a new entry (right-click File System and select Add File). Specify the location of USBSTOR.INF (usually SystemRoot%\Inf\USBSTOR.INF)
Change the security settings of the new entry. The security settings that you specify here will be enforced on the USBSTOR.INF of every computer to which the GPO is applied. This process is not additive, which means that the previous security settings of USBSTOR.INF will be overwritten by the ones given in the GPO. It is therefore recommended to grant full control to SYSTEM and local administrators. But unlike in the default security settings of USBSTOR.INF, you should not grant any priviledges to Everybody. You do not need to explicitly deny access – just omit an entry for Everybody. Optionally, you can grant read access to a certain group. Members of this group will be able to use USB storage.
Repeat the above two steps for USBSTOR.PNF.
Download USBSTOR.ADM.
Back in the GPO, right-click Administrative Templates under Computer Configuration and select Add/Remove Templates. Click Add and browse to the location of USBSTOR.ADM. Close the dialog.
You should now have an additional entry called Services and Drivers in Administrative Templates. Click on it. If it is empty, select View from the menu and uncheck Show Policies Only. Click back on Services and Drivers in Administrative Templates. It should now show the USB Storage policy. Double click it, select Enabled and pick Disabled from the Startup Type drop down. Again, the policy must be enabled wheras Startup Type must be Disabled.
Close the dialog as well as the GPO and boot/reboot one of your workstations. Make sure no USB strorage device is connected to that computer. Log on with administrative privileges and check the permissions of USBSTOR.INF and USBSTOR.PNF. Check the value of the HKEY_LOCAL_MACHINE\SYSTEM\CurrentControlSet\Services\UsbStor\Start. It should be 4. It is also ok if the UsbStor key doesn't exist at all.
On the same workstation, log off and back on as a user that should not have access to USB storage. Connect a USB memory stick or a similar device. Nothing should happen. Remove the memory stick.
Log on as a user that should have access to USB storage and execute net start usbstor in a command shell or at Start – Run before connecting the memory stick. The memory stick should initialized and mapped to a drive letter. If USBSTOR fails to start, it's probably because this is the first time a memory stick is plugged into the workstation in which case USBSTOR is not yet installed. Nevertheless, the memory stick should be initialized and mapped correctly but you need to reboot in order to reapply the administrative template such that USBSTOR is disabled again. Alternatively, you can disable it manually by downloading and double clicking USBSTOR.REG as well as executing net stop usbstor.
Instruct the users with access to USB storage that they need to execute net start usbstor before they can connect a USB storage device.
Jumat, 16 Januari 2009
Firefox keyboard shortcuts
CTRL + A Select all text on a webpage
CTRL + B Open the Bookmarks sidebar
CTRL + C Copy the selected text to the Windows clipboard
CTRL + D Bookmark the current webpage
CTRL + F Find text within the current webpage
CTRL + G Find more text within the same webpage
CTRL + H Opens the webpage History sidebar
CTRL + I Open the Bookmarks sidebar
CTRL + J Opens the Download Dialogue Box
CTRL + K Places the cursor in the Web Search box ready to type your search
CTRL + L Places the cursor into the URL box ready to type a website address
CTRL + M Opens your mail program (if you have one) to create a new email message CTRL + N Opens a new Firefox window
CTRL + O Open a local file
CTRL + P Print the current webpage
CTRL + R Reloads the current webpage
CTRL + S Save the current webpage on your PC
CTRL + T Opens a new Firefox Tab
CTRL + U View the page source of the current webpage
CTRL + V Paste the contents of the Windows clipboard
CTRL + W Closes the current Firefox Tab or Window (if more than one tab is open) CTRL + X Cut the selected text CTRL + Z Undo the last action
Troubleshooting Computer Freezes / Lockups
1. Check for recently installed software or hardware.
If the lockups started to happen after you installed a new peace of hardware, new software program, or new drivers, uninstall it and see if the problem goes away. If you don't know what software you installed recently or don't know what changes made your computer crash, you can try System Restore which comes with XP. It restores your computer to a previous working state. Run the application from here: Start Menu -> Programs -> Accessories -> System Tools -> System Restore.
2. Run your antivirus program.
One of the first things to do in the case of sudden lockups is to run your antivirus program. Check your antivirus manufacturer's website for updates and latest virus definition files. (This is absolutely necessary, outdated antivirus is not going to be of any use!) If you don't have antivirus software installed - or if updates are unavailable - run one of the web-based antivirus scans that some major antivirus vendors like Trend Micro are offering for free.
3. Run some good spyware removal tool.
If your machine is not infected with any viruses, it is still possible that it has some harmful adware or spyware is present. Download and run some good spyware removal tool such as AdAware, Spybot S&D or SpywareBlaster. These tools are superb spyware prevention tools and provide regular updates.
4. Check for free hard drive space.
When no viruses are found, check out free hard drive space on drive C:. Make sure there is more than 20% of free space available; low disk space can lead to random lockups.
5. Check for overheating.
Overheating is another known cause of lockups. It can be caused by problems with fans inside the case, dust buildup, or other cooling problems. Make sure the power supply fan and CPU fan are running and free of dust buildup. You can check the temperatures inside the case by running Motherboard monitor http://mbm.livewiredev.com- make sure the temperatures are within the preset limits. Be very careful while cleaning inside the computer case (use plastic vacuum crevice tool) and NEVER OPEN THE POWER SUPPLY CASE as it contains high voltage.
6. Check the hard disk.
Check the hard disk - it is possible that its logical structure is corrupted. To check the disk for errors, right-click on the disk C: icon in "My Computer", select the "Tools" tab, check all check boxes in the "Check disk options" field, and press the "Check now" button. It should ask whether you want to schedule the check next time you restart your computer - answer "Yes" and restart your PC. The check will be performed automatically after startup; it can take a while, so be patient. The program will attempt to fix some problems automatically – however, if the hard disk is failing physically, it will need to be replaced. It is also a good idea to run Disk Defragmenter (located in Start Menu > Programs > Accessories > System Tools) to optimize data placement on the hard disk for increased performance and reliability.
7. Check the memory.
Sometimes random lockups can be attributed to the computer memory (RAM) starting to fail. You can test the memory by running Windows Memory Diagnostic that can be downloaded from Microsoft Online Crash Analysis If memory problems are found, try re-seating the RAM (pull it out and plug it back in). If it doesn't work, replace the defective RAM.
8. Check for other hardware problems (advanced users).
More hardware-related problems can be diagnosed by running hardware tests from the Ultimate Boot CD that can be downloaded from Ultimate Boot CD - Overview However, you should only use it if you know what are you doing - some programs on that CD can be dangerous when used inappropriately (for example, some of them can wipe the contents of your hard disk).
9. Update Windows and drivers.
Some lockups can be caused by outdated software components. Everyone should ensure their Windows Updates are on automatic (Control Panel -> Automatic Updates). Set and forget - Windows will remember for you. (As an alternative you may want to run a windows update: http://windowsupdate.microsoft.com). Also ensure you regularly update all your hardware drivers from vendors' websites. These contain bug fixes and resolves compatibility issues with other hardware.
The above steps will help diagnose and eliminate the most common causes of lockups. Hundreds more of other possible scenarios need to be dealt with on a case-by-case basis, as it all goes down to your particular computer configuration. Asking in troubleshooting forums/newsgroups should help you figure out solutions to not-so-obvious lockup cases.
51 Run Commands In Windows Xp
Run command are very useful, but sometimes you are not able to remember them. Use these commands and you will find how powerful they are.
1. Accessibility Controls - access.cpl
2. Accessibility Wizard - accwiz
3. Add Hardware Wizard - hdwwiz.cpl
4. Add/Remove Programs - appwiz.cpl
5. Administrative Tools - control admintools
6. Automatic Updates - wuaucpl.cpl
7. Bluetooth Transfer Wizard - fsquirt
8. Calculator - calc
9. Certificate Manager - certmgr.msc
10. Character Map - charmap
11. Check Disk Utility - chkdsk
12. Clipboard Viewer - clipbrd
13. Command Prompt - cmd
14. Component Services - dcomcnfg
15. computer - compmgmt.msc
16. Control Panel - control
17. Date and Time Properties - timedate.cpl
18. DDE Shares - ddeshare
19. Device Manager - devmgmt.msc
20. Direct X Troubleshooter - dxdiag
21. Disk Cleanup Utility - cleanmgr
22. Disk Defragment - dfrg.msc
23. Disk Management - diskmgmt.msc
24. Disk Partition Manager - diskpart
25. Display Properties - control desktop
26. Display Properties - desk.cpl
27. Dr. Watson System Troubleshooting Utility - drwtsn32
28. Driver Verifier Utility - verifier
29. Event Viewer - eventvwr.msc
30. Files and Transfer Tool - migwiz
31. File Signature Verification Tool - sigverif
32. Findfast - findfast.cpl
33. Firefox - firefox
34. Folders Properties - control folders
35. Fonts - control fonts
36. Fonts Folder - fonts
37. Free Cell Card Game - freecell
38. Game Controllers - joy.cpl
39. Group Policy Editor (for xp professional) - gpedit.msc
40. Hearts Card Game - mshearts
41. Help and Support - helpctr
42. HyperTerminal - hypertrm
43. Iexpress Wizard - iexpress
44. Indexing Service - ciadv.msc
45. Internet Connection Wizard - icwconn1
46. Internet Explorer - iexplore
47. Internet Properties - inetcpl.cpl
48. Keyboard Properties - control keyboard
49. Local Security Settings - secpol.msc
50. Local Users and Groups - lusrmgr.msc
51. Logs You Out Of Windows - logoff
Tips To select Antivirus
So you made the decision to buy an AntiVirus (AV) to safeguard your system. But stuck with what to look for in the AV?
Here are some of the tips that will help you in selecting the best AV for your computer:
- Load on System
- Type of subscription
- Ease of Upgradation
- Technical Support
- Frequency of the definitions or updates
Load on System One of the common complaints from the users is that AV is taking lot of system resources. I think the problem could be caused at the startup of the computer where the most of the programs are configured to load and slow down the system. One way to get around this is to disable or delay or the startup of other applications. Remember it is very essential that AV loads at startup and not at a later time because some of the threats tend to load at startup and if they are allowed to load, they could even disable the AV.
Some of the other tips include, increasing the system RAM or Memory. Not only does this speed up the computing, but also allows you to multitask. Here is an easy and simple way to selectively allow programs to start:1. Go to Start > Run2. Type MSCONFIG3. Click on the Startup tab4. Uncheck the programs like Adobe, Winamp, MSN /Yahoo/Gtalk Messenger and etc5. Click OK
Technical Support Believe me, one factor that is going to have a major impact on your peace of mind is the Technical Support from your vendor on their product. I have seen people tear their hairs on the issues that can arise out of the blue.
Most of the problems arise while installing the product. Make sure you read the minimum hardware requirements, supported OS, incompatibility with other products before you decide to zero in on any product. Such information is published in the vendor website.
NOTE: You should Install and Use only One AntiVirus at a time. Having multiple AV to protect your system can cause all of them to malfunction and allow a threat to affect your system!
Technical support can be free or charged. Normally, free technical support is restricted to Knowledge Base Articles and Email or Chat support. KB articles are a good source of information for known issues and solutions for them. Some AV vendors even run support forum, where the solution comes from people like you and me.
Paid support comes in the form of Telephone calls. Here also you may have to go through the maze of IVRs to actually get to talk to the agent. By the time you get to talk to the agent you may be zapped, this does not end here….but to actually get the solution to your problem, you will have to shell out some money which may not be worthwhile. The charge for the paid support is almost equal to the half of the product price! (remember online search engines Google, Yahoo and MSN search are your friends!)
Frequency of virus definitions/updatesWell, if you think just installing an Antivirus would protect your system, hang on. You will also need to download the updates or antivirus definitions to keep up with the new threats. In this fast changing world of technology, newer threats in the form or Viruses, Worms and Trojans (Click here to read the difference between Viruses Worm and Trojans) come out each day. While it may be difficult for AV companies to keep the pace with all of them, some AV Vendors use heuristics to at least quarantine some of these. Symantec for example uses a technology called as Bloodhound to isolate the malicious threats for which complete information is not known. The common practice is this space for most AntiVirus vendors is to release the updates on a weekly basis. However, if there is an outbreak, the definitions to cure the same are released instantly to prevent any zero day attacks. Read the product information at the vendor’s site carefully to know the frequency of updates. An AV that does not get definitions on a periodic use may not be of much use.
Suggestion: Configure your AV to automatically download and install the updates as and when new updates are released.
Ease of UpgradationThe standard practice in the AntiVirus (AV) vendor space is that each year a newer version of the product is released. More often than not, you may end up upgrading to the newer version. Upgradation basically means installing a newer version over the existing version. So ensure that the AV you buy has the good track record of clean upgradation.
Some AV applications are known to have issues while upgrading from an older version to newer version. If not done correctly, they may leave traces in the registry and can cause major issues while installing. So watch out while you decide to Upgrade or Renew for Updates.
Type of Subscription AV products generally have usage license for a period of one year. That is you pay and use for one year and after which you will have to renew it in order to receive the AV Updates / Virus definitions. Know the difference between Upgrade and Update.
An update is a periodic Antivirus definition or signature release from the vendor. This can be periodic, for example Symantec releases its Virus definition every Wednesday. Updates include Virus definitions, program improvements, patches etc.
An upgrade is the iteration in the version of the product. For example, you are using Norton Antivirus (NAV) 2007 and it is reaching its one year period and Symantec has now released NAV 2008. You will be presented an option to upgrade to the newer version or continue using the older version by renewing the subscription fees, in which case you will continue to use NAV 2007.
An upgrade normally costs little more than renewal and its better to go for an upgrade because there will bound to be improvements in the newer version.
Install XP From Dos
Install Xp From Dos
If XP will not install from the CD or if you have a new drive with no operating system on
it yet try these:
Install Windows XP from the hard drive with Windows 98 already installed:
Boot Windows 98
Insert the XP CD into your CD reader
Explore Windows XP through My Computer
Copy i386 folder to C:\
Go into C:\i386 folder and double click on winnt32.exe to launch the setup from the hard drive
Install Windows XP from DOS (ie. no OS on a new hard drive):
Boot with a Windows 98 Start Up disk
Insert the Windows 98 CD into the CD reader
Run smartdrv.exe from the Win98 directory on the windows 98 CD (file caching)
Type cd.. to back up to the root directory
Insert Windows XP CD into the CD reader
Copy the i386 folder to C:\
Go into C:\i386 folder on C: and type winnt.exe to launch the setup from the hard drive.
Make XP as easier as never before
Windows XP Tricks & Tips!!!!
Opening Ports or Adding Allowed Programs with SP2's Firewall
1.Click on Start / Run
2.Enter in firewall.cpl
3.Click on the Exceptions tab
Adding a Port for Internet Access:
1.Click on the Add Port button
2.Name it whatever you want
3.Enter in the ports you want to open
Adding a Program for Internet Access
1.Click on Add Program... button
2.A list of all installed programs will be displayed
3.Highlight the one you want to include for Internet access
4.Click on the OK button
Autoexec.nt or Config.nt Errors
If you are getting errors similar to:
The system file is not suitable for running MS-DOS and Microsoft Windows applications. Choose 'Close' to terminate the application.
Try copying the file from \windows\repair directory to the one that is in the \windows\system32 directory.
Common Control Panel Applets
The follow are some common Control Panel Applets that are located in the \windows\system32 directory.
If you find yourself using any of these frequently, then you can simply make shortcu[/color]ts to them on your desktop.
appwiz.cpl >>Add/Remove Programs
desk.cpl >> Display Properties
firewall.cpl >> Firewall Settings
inetcpl.cpl >> Internet Options
mmsys.cpl >> Sound and Audio
ncpa.cpl >> Network Connections
nusrmgr.cpl >> User Accounts
powercfg.cpl >> Power Options
sysdm.cpl >>System Properties
wscui.cpl >> Security Center
wuaucpl.cpl >> Automatic Updates Configuration Go to Top
Windows Explorer Opens Search Companion Rather than the Folder
If the Windows Explorer opens up the Search Companion rather than opening up the actual folder, the default setting for opening a folder is changed.
To correct this:
Start Regedit
Go to HKEY_CLASSES_ROOT \ Directory \ shell
Edit the default value to be explorer or none
Guest Only Network Access
If you try and connect to an XP computer and are shown a logins screen with only the computername/Guest,
You may need to change one of the Local Security Policies:
Got to Control Panel - Administrative Tools
Go to Local Policies - Security Options
Check teh Network access: Sharing and security model for local accounts
Set it to Classic - local users authenticate as themselves
Hiding a XP Computer from Network Neighborhood
If you want to share files from a XP computer,
yet want to remove it from showing up in the Network Neighborhood,
Run net config server /hidden:yes
Easy Way to Share Multiple Folders
If you need to share multiple folders, running the program SHRPUBW.EXE will bring up a simple dialog box to let you:
Browse to the folder you want to share
Enter in a Share name
Ender in a Share description
Set permissions. Several choices are available
Restart the process from within the same program Go to top
Not Viewing Zip Files as Folders
If you want to turn of WindowsXP showing Zip files as folders,
just run:
regsvr32 /u zipfldr.dll
Setting Capslock, Numlock, Scroll Lock
If you want to set the startup state for any or all of these keys,
you just need to edit the registry.
Start Regedit
Go to HKEY_CURRENT_USER \ Control Panel \ Keyboard
Open InitialKeyboardIndicators
Change the value to one of the following numbers
0 - All Keys off
1 - Caps Lock on
2 - Num Lock on
4 - Scroll Lock on
For multiple keys, add their values:
3 - Caps Lock and Num Lock on
5 - Caps Lock and Scroll Lock on
6 - Num Lock and Scroll Lock on
7 - Caps Lock, Num Lock, and Scroll Lock on
Log off and back on again
Restoring Desktop Icon to the Quicklaunch Bar
If you mistakenly deleted the icon for the Desktop on the Quicklaunch toolbar
Go to C:\Documents and Settings\user_name\Application Data\Microsoft\Internet Explorer\Quick Launch
(where user_name is replaced by your login name)
Create a Text file called ShowDesktop.SCF with the following contents:
[Shell]
Command=2
IconFile=explorer.exe,3
[Taskbar]
Command=ToggleDesktop Go to top
Network Access After Norton Anti-Virus Install
Sometimes you can't access a WinXP computer after installing Norton Anti-Virus.
There might be a variety of errors at the other computer depending on the operating system.
On the XP computer, in the Event Viewer / System log, there will be the following error:
The server's configuration parameter "irpstacksize" is too small for the server to use a local device.
Start Regedit
Go to HKEY_LOCAL_MACHINE\SYSTEM\CurrentControlSet\Services\lanmanserver\parameters
Edit the IRPStackSize
Give it a value of 15
Reboot the computer
Configure for Auto-Logon
If you are the only person using the computer and what to have it automatically log you on,
Start / Run / "control userpasswords2" - no quotes
Uncheck User must enter a user name and password to use this computer
Services You Can Disable
There are quite a few services you can disable from starting automatically.
This would be to speed up your boot time and free resources.
They are only suggestions so I suggestion you read the description of each one when you run Services
and that you turn them off one at a time.
Some possibilities are:
Alerter - Sends alert messages to specified users that are connected to the server computer.
Application Management - Allows software to tap directly into the Add/Remove Programs feature via the Windows Installer technology.
Background Intelligent Transfer Service - The Background Intelligent Transfer
service is used by programs (such as Windows AutoUpdate) to download files by using spare bandwidth.
Clipbook - ClipBook permits you to cut and paste text and graphics over the network.
Error Reporting Service - Allows applications to send error reports to Microsoft in the event of an application fault.
Fast User Switching - Windows XP allows users to switch quickly between accounts, without requiring them to log off.
Help and Support - Allows the XP Built-in Help and Support Center to run.
IMAPI CD-Burning COM Service - You don't need this if you have other software to create CDs.
Indexing Service - Indexes contents and properties of files on local and remote computers; provides rapid access to files through flexible querying language.
IP SEC - Manages IP security policy and starts the ISAKMP/Oakley (IKE) and the IP security driver. If you are not on a domain, you likely don't need this running.
Messenger - Transmits net send and Alerter service messages between clients and servers. This is how a lot of pop-up windows start appearing on your desktop.
Net Logon - Supports pass-through authentication of account logon events for computers in a domain. If you are not on a domain, you don't need this running
Network DDE - Provides network transport and security for Dynamic Data Exchange (DDE) for programs running on the same computer or on different computers.
NT LM Security Support Provider - Provides security to remote procedure call (RPC) programs that use transports other than named pipes.
Performance Logs and Alerts - Collects performance data from local or remote computers based on preconfigured schedule parameters, then writes the data to a log or triggers an alert. If you don't need to monitor your performance logs, then you don't need this service.
Portable Media Serial Number - Retrieves the serial number of any portable music player connected to your computer
QOS RSVP - Provides network signaling and local traffic control setup functionality for QoS-aware programs and control applets.
Remote Desktop Help Session Manager - Manages and controls Remote Assistance. If you are not using Remote Desktop you don't need this service.
Remote Registry - Enables remote users to modify registry settings on this computer.
Routing & Remote Access - Offers routing services to businesses in local area and wide area network environments. Allows dial-in access.
Secondary Login - Enables starting processes under alternate credentials. This is what allows you to run an application as another user.
Smart Card - Manages access to smart cards read by this computer.
Smart Card Helper - Enables support for legacy non-plug and play smart-card readers used by this computer.
SSDP Discovery Service - Enables discovery of UPnP devices on your home network.
TCP/IP NetBIOS Helper - Enables support for NetBIOS over TCP/IP (NetBT) service and NetBIOS name resolution. This should not be needed in today's network environment.
Telnet - Enables a remote user to log on to this computer and run programs, and supports various TCP/IP Telnet clients.
Uninterruptible Power Supply Service - Manages an uninterruptible power supply (UPS) connected to the computer.
Universal Plug and Play Device Host - Provides support to host Universal Plug and Play devices
Upload Manager - Manages synchronous and asynchronous file transfers between clients and servers on the network.
Volume Shadow Copy Service - Manages and implements Volume Shadow Copies used for backup and other purposes.
Web Client - Enables Windows-based programs to create, access, and modify non-local files across the Internet.
Wireless Zero Configuration - Provides automatic configuration for the 802.11 adapters
WMI Performance Adapter - Provides performance library information from WMI HiPerf providers.
Cleaning the Prefetch Directory
WindowsXP has a new feature called Prefetch. This keeps a shortcut to recently used programs.
However it can fill up with old and obsolete programs.
To clean this periodically go to:
Star / Run / Prefetch
Press Ctrl-A to highlight all the shorcuts
Delete them Go to top
Not Displaying Logon, Logoff, Startup and Shutdown Status Messages
To turn these off:
Start Regedit
Go to HKEY_LOCAL_MACHINE\SOFTWARE\Microsoft\Windows\CurrentVersion\policies\system
If it is not already there, create a DWORD value named DisableStatusMessages
Give it a value of 1
Repair Install
If XP is corrupted to the point where none of the previous solutions get it to boot,
you can do a Repair Install that might work as well as keep the current settings.
Make sure you have your valid WindowsXP key.
The whole process takes about half an hour depending on your computer
If you are being prompted for the administrator's password, you need to choose the 2nd repair option, not the first.
Insert and boot from your WindowsXP CD
At the second R=Repair option, press the R key
This will start the repair
Press F8 for I Agree at the Licensing Agreement
Press R when the directory where WindowsXP is installed is shown. Typically this is C:\WINDOWS
It will then check the C: drive and start copying files
It will automatically reboot when needed. Keep the CD in the drive.
You will then see the graphic part of the repair that is like during a normal install of XP (Collecting Information, Dynamic Update, Preparing Installation, Installing Windows, Finalizing Installation)
When prompted, click on the Next button
When prompted, enter your XP key
Normally you will want to keep the same Workgroup or Domain name
The computer will reboot
Then you will have the same screens as a normal XP Install
Activate if you want (usually a good idea)
Register if you want (but not necessary)
Finish
At this point you should be able to log in with any existing accounts. Go to top
NTOSKRNL Missing or Corrupt
If you get an error that NTOSKRNL not found:
Insert and boot from your WindowsXP CD.
At the first R=Repair option, press the R key
Press the number that corresponds to the correct location for the installation of Windows you want to repair.
Typically this will be #1
Change to the drive that has the CD ROM.
CD i386
expand ntkrnlmp.ex_ C:\Windows\System32\ntoskrnl.exe
If WindowsXP is installed in a different location, just make the necessary change to C:\Windows
Take out the CD ROM and type exit
HAL.DLL Missing or Corrupt
If you get an error regarding a missing or corrupt hal.dll file, it might simply be the BOOT.INI file on the root of the C: drive that is misconfigured
Insert and boot from your WindowsXP CD.
At the first R=Repair option, press the R key
Press the number that corresponds to the correct location for the installation of Windows you want to repair.
Typically this will be #1
Type bootcfg /list to show the current entries in the BOOT.INI file
Type bootcfg /rebuild to repair it
Take out the CD ROM and type exit
Corrupted or Missing \WINDOWS\SYSTEM32\CONFIG
If you get the error:
Windows could not start because the following files is missing or corrupt
\WINDOWS\SYSTEM32\CONFIG\SYSTEM or \WINDOWS\SYSTEM32\CONFIG\SOFTWARE
Insert and boot from your WindowsXP CD.
At the first R=Repair option, press the R key
Press the number that corresponds to the correct location for the installation of Windows you want to repair.
Typically this will be #1
Enter in the administrator password when requested
cd \windows\system32\config
Depending on which section was corrupted:
ren software software.bad or ren system system.bad
Depending on which section was corrupted
copy \windows\repair\system
copy \windows\repair\software
Take out the CD ROM and type exit Go to top
NTLDR or NTDETECT.COM Not Found
If you get an error that NTLDR is not found during bootup,
If you have FAT32 partitions, it is much simpler than with NTFS.
Just boot with a Win98 floppy and copy the NTLDR or NTDETECT.COM files
from the i386 directory to the root of the C:\ drive.
For NTFS:
Insert and boot from your WindowsXP CD.
At the first R=Repair option, press the R key
Press the number that corresponds to the correct location for the installation of Windows you want to repair.
Typically this will be #1
Enter in the administrator password when requested
Enter in the following commands (X: is replaced by the actual drive letter that is assigned to the CD ROM drive.
COPY X:\i386\NTLDR C\:
COPY X:\i386\NTDETECT.COM C:\
Take out the CD ROM and type exit
Bringing Up the Shutdown Dialog Box
Create a new txt file somewhere on your system, open it and put in this one line:
(new ActiveXObject("Shell.Application")).ShutdownWindows();
Save and Close the file. Change the extension to js and your got it.
You can make a shortcut to that file to make it easy to shut down your system.
Hiding the Last User Logged On
If you use the standard NT style of login and want to hide the last user:
Start the Group Policy Editor (gpedit.msc)
Go to Computer Configuration / Windows Settings / Security Settings / Local Policies / Security Options
Scroll down to Interactive logon: Do not display last user name
Set it to Enable Go to top
Poweroff at Shutdown
If your computer does not turn off the power when doing a shutdown,
you may need to edit the registry. I have all the correct BIOS and Power settings and still needed to do this.
Start Regedit
Go to HKEY_CURRENT_USER\Control Panel\Desktop
Edit the key PowerOffActive and give it a value of 1
You can do the same in HKEY_USERS\.DEFAULT\Control Panel\Desktop
Remembering Folder Settings
If XP does not remember your folder settings, delete or rename the following registry keys
[HKEY_CURRENT_USER\Software\Microsoft\Windows\ShellNoRoam\BagMRU]
[HKEY_CURRENT_USER\Software\Microsoft\Windows\ShellNoRoam\Bags]
Preventing Applications from Stealing the Focus
To prevent applications from stealing the focus from the window you are working
Start Regedit
Go to HKEY_CURRENT_USER \ Control Panel \ Desktop
Edit the key ForegroundLockTimeout
Give it a value of 00030d40
Disable Explorer Thumbnail View
If you want disable the Explorer's ability to show the Thumbnail View ,
Start Regedit
Go to HKEY_CURRENT_USER \ Software \ Microsoft \ Windows \ CurrentVersion \ Explorer \ Advanced \
Change ClassicViewState to 1 Go to top
Disable Shared Documents
To disable the Shared Documents folder that shows up on the network
Start Regedit
Go to HKEY_CURRENT_USER \ Software \ Microsoft \ Windows \ CurrentVersion \ Policies \ Explorer \
Create a new DWORD Value
Give it the name NoSharedDocuments
Give it a value of 1
Log off or reboot
Removing Thumbs.db Files
When viewing a folder with the Thumbnail view, WindowsXP creates a thumbs.db file.
This is a cache of the current pictures in that directory.
If you want to turn this feature off and save a little disk space
Start the Windows Explorer
Go to Tools / Folder Options / View
In the first section under Files and Folders, check Do not cache thumbnails
Now you can search for the thumbs.db file on your computer and remove them. No more should be created.
Enable / Disable the Task Manager
Start Regedit
Go to HKEY_CURRENT_USER\Software\Microsoft\Windows\CurrentVersion\Policies\System
Create the Dword value DisableTaskMgr
Give it a value of 0 to enable it
Give it a vaule of 1 to disable it Go to top
Clearing the Page File on Shutdown
Another way to set the computer to clear the pagefile without directly editing the registry is:
Click on the Start button
Go to the Control Panel
Administrative Tools
Local Security Policy
Local Policies
Click on Security Options
Right hand menu - right click on "Shutdown: Clear Virtual Memory Pagefile"
Select "Enable"
Reboot
If you want to clear the page file on each shutdown:
Start Regedit
Go to HKEY_LOCAL_MACHINE\SYSTEM\CurrentControlSet\Control\Session Manager\Memory Management\ClearPageFileAtShutdown
Set the value to 1
No GUI Boot
If you don't need to see the XP boot logo,
Run MSCONFIG
Click on the BOOT.INI tab
Check the box for /NOGUIBOOT
Using the Classic Search in Explorer
If you prefer to use the classic search style in Explorer,
Start Regedit
Go to HKEY_CURRENT_USER\Software\Microsoft\Windows\CurrentVersion\Explorer\CabinetState
Add a String Key called Use Search Asst
Give it a value of no Go to top
Changing Drive Letters
If you want to change the letters assigned to your fixed or removable drives:
Right Click on My Computer
Select Manage
Select Disk Management
For a Fixed Disk:
Select it
Right click
Select Change Drive Letter and Path
Click on the Edit button
Enter in the letter you want to use
For a Removable Disk:
In the lower, right hand panel, right click on the Disk or CD ROM #
Select Change Drive Letter and Path
Click on the Edit button
Enter in the letter you want to use
Changing the Registered Owner
Start Regedit
HKEY_LOCAL_MACHINE\SOFTWARE\Microsoft\Windows NT\CurrentVersion
From there you can edit the name in the Registered Owner key
Decreasing Boot Time
Microsoft has made available a program to analyze and decrease the time it takes to boot to WindowsXP
The program is called BootVis
Uncompress the file.
Run BOOTVIS.EXE
For a starting point, run Trace / Next Boot + Driver Delays
This will reboot your computer and provide a benchmark
After the reboot, BootVis will take a minute or two to show graphs of your system startup.
Note how much time it takes for your system to load (click on the red vertical line)
Then run Trace / Optimize System
Re-Run the Next Boot + Drive Delays
Note how much the time has decreased
Mine went from approximately 39 to 30 seconds. Go to top
Hide/Unhide Logon Names
If you want to hide or unhide the names of users that are displayed on the initial logon screen:
Start Regedit
Go to HKEY_LOCAL_MACHINE \ SOFTWARE \ Microsoft \ Windows NT \ CurrentVersion \ Winlogon \ SpecialAccounts \ UserList
Add a DWORD with the name of the user account you want to hide
Make sure it has a value of 0
If there is an existing account, you can unhide it by giving it a value of 1
WindowsXP Command Line Utilities
While there are a lot of command line utilities in WindowsXP, here are some that I have been using lately.
bootcfg - Configures, queries, or changes Boot.ini file settings.
driverquery - Displays a list of all installed device drivers and their properties.
getmac - Returns the media access control (MAC) address and list of network protocols associated with each address for all network cards in each computer
gpresult - Displays Group Policy settings and Resultant Set of Policy (RSOP) for a user or a computer
netsh - You can use commands in the Netsh Interface IP context to configure the TCP/IP protocol
schtasks - Schedules commands and programs to run periodically or at a specific time
systeminfo - Displays detailed configuration information about a computer and its operating system
Creating an Automated Install of WindowsXP
On the WindowsXP CP, in the SUPPORT\TOOLS directory,
there is a file called DEPLOY.CAB.
Extract the programs DEPLOY.CHM (help file) and SETUPMGR.EXE (main program)
Run SETUPMGR and answer the prompts.
This will create both a unattend.bat and unattend.txt file you can use for automated installs.
Note: The batch file might need some minor modification for file locations but it is fairly basic.
Disabling Hibernation
If you don't want to use up the disk space taken by Hibernation, or don't need to use it at all,
you can easily disable it.
Open up the Control Panel / Power Options icon
Click on the Hibernation icon
Uncheck Enable Hibernation Go to top
Increasing System Performance
If you have 512 megs or more of memory, you can increase system performance
by having the core system kept in memory.
Start Regedit
Go to HKEY_LOCAL_MACHINE\SYSTEM\CurrentControlSet\Control\Session Manager\Memory Management\DisablePagingExecutive
Set the value to be 1
Reboot the computer
Common Command Console Utilities
WindowsXP comes with quite a few console utilities you can easily run from the command line:
Computer Management - compmgmt.msc
Disk Managment - diskmgmt.msc
Device Manager - devmgmt.msc
Disk Defrag - dfrg.msc
Event Viewer - eventvwr.msc
Shared Folders - fsmgmt.msc
Group Policies - gpedit.msc
Local Users and Groups - lusrmgr.msc
Performance Monitor - perfmon.msc
Resultant Set of Policies - rsop.msc
Local Security Settings - secpol.msc
Services - services.msc
Component Services - comexp.msc
Automatically Ending Non-Responsive Tasks
Start Regedit
Go to HKEY_CURRENT_USER\Control Panel\Desktop\AutoEndTasks
Set the value to be 1
In the same section, change the WaitToKillAppTimeout to the number of milliseconds you want.
Changing the Internet Explorer Title
Start Regedit
Go to HKEY_CURRENT_USER\Software\Microsoft\Internet Explorer\Main\Window Title
Enter what you want appear in the title bar
Changing Programs That Start Automatically
WindowsXP has a similar program, MSCONFIG, that was available in Windows98.
This allows you to view and change what programs are automatically started each time you log in.
The new version also allows you to view and edit the boot.ini file (as well as check for errors and use several advanced switches)
best regards
19 secrets of XP
1. It boasts how long it can stay up. Whereas previous versions of Windows were coy about how long they went between boots, XP is positively proud of its stamina. Go to the Command Prompt in the Accessories menu from the All Programs start button option, and then type 'systeminfo'. The computer will produce a lot of useful info, including the uptime. If you want to keep these, type 'systeminfo > info.txt'. This creates a file called info.txt you can look at later with Notepad. (Professional Edition only).
2. You can delete files immediately, without having them move to the Recycle Bin first. Go to the Start menu, select Run... and type ' gpedit.msc'; then select User Configuration, Administrative Templates, Windows Components, Windows Explorer and find the Do not move deleted files to the Recycle Bin setting. Set it. Poking around in gpedit will reveal a great many interface and system options, but take care -- some may stop your computer behaving as you wish. (Professional Edition only).
3. You can lock your XP workstation with two clicks of the mouse. Create a new shortcut on your desktop using a right mouse click, and enter 'rundll32.exe user32.dll,LockWorkStation' in the location field. Give the shortcut a name you like. That's it -- just double click on it and your computer will be locked. And if that's not easy enough, Windows key + L will do the same.
4. XP hides some system software you might want to remove, such as Windows Messenger, but you can tickle it and make it disgorge everything. Using Notepad or Edit, edit the text file /windows/inf/sysoc.inf, search for the word 'hide' and remove it. You can then go to the Add or Remove Programs in the Control Panel, select Add/Remove Windows Components and there will be your prey, exposed and vulnerable.
5. For those skilled in the art of DOS batch files, XP has a number of interesting new commands. These include 'eventcreate' and 'eventtriggers' for creating and watching system events, 'typeperf' for monitoring performance of various subsystems, and 'schtasks' for handling scheduled tasks. As usual, typing the command name followed by /? will give a list of options -- they're all far too baroque to go into here.
6. XP has IP version 6 support -- the next generation of IP. Unfortunately this is more than your ISP has, so you can only experiment with this on your LAN. Type 'ipv6 install' into Run... (it's OK, it won't ruin your existing network setup) and then 'ipv6 /?' at the command line to find out more. If you don't know what IPv6 is, don't worry and don't bother.
7. You can at last get rid of tasks on the computer from the command line by using 'taskkill /pid' and the task number, or just 'tskill' and the process number. Find that out by typing 'tasklist', which will also tell you a lot about what's going on in your system.
8. XP will treat Zip files like folders, which is nice if you've got a fast machine. On slower machines, you can make XP leave zip files well alone by typing 'regsvr32 /u zipfldr.dll' at the command line. If you change your mind later, you can put things back as they were by typing 'regsvr32 zipfldr.dll'.
9. XP has ClearType -- Microsoft's anti-aliasing font display technology -- but doesn't have it enabled by default. It's well worth trying, especially if you were there for DOS and all those years of staring at a screen have given you the eyes of an astigmatic bat. To enable ClearType, right click on the desktop, select Properties, Appearance, Effects, select ClearType from the second drop-down menu and enable the selection. Expect best results on laptop displays. If you want to use ClearType on the Welcome login screen as well, set the registry entry HKEY_USERS/.DEFAULT/Control Panel/Desktop/FontSmoothingType to 2.
10. You can use Remote Assistance to help a friend who's using network address translation (NAT) on a home network, but not automatically. Get your pal to email you a Remote Assistance invitation and edit the file. Under the RCTICKET attribute will be a NAT IP address, like 192.168.1.10. Replace this with your chum's real IP address -- they can find this out by going to
Code:
www.whatismyip.com
-- and get them to make sure that they've got port 3389 open on their firewall and forwarded to the errant computer.
11. You can run a program as a different user without logging out and back in again. Right click the icon, select Run As... and enter the user name and password you want to use. This only applies for that run. The trick is particularly useful if you need to have administrative permissions to install a program, which many require. Note that you can have some fun by running programs multiple times on the same system as different users, but this can have unforeseen effects.
12. Windows XP can be very insistent about you checking for auto updates, registering a Passport, using Windows Messenger and so on. After a while, the nagging goes away, but if you feel you might slip the bonds of sanity before that point, run Regedit, go to HKEY_CURRENT_USER/Software/Microsoft/Windows/Current Version/Explorer/Advanced and create a DWORD value called EnableBalloonTips with a value of 0.
13. You can start up without needing to enter a user name or password. Select Run... from the start menu and type 'control userpasswords2', which will open the user accounts application. On the Users tab, clear the box for Users Must Enter A User Name And Password To Use This Computer, and click on OK. An Automatically Log On dialog box will appear; enter the user name and password for the account you want to use.
14. Internet Explorer 6 will automatically delete temporary files, but only if you tell it to. Start the browser, select Tools / Internet Options... and Advanced, go down to the Security area and check the box to Empty Temporary Internet Files folder when browser is closed.
15. XP comes with a free Network Activity Light, just in case you can't see the LEDs twinkle on your network card. Right click on My Network Places on the desktop, then select Properties. Right click on the description for your LAN or dial-up connection, select Properties, then check the Show icon in notification area when connected box. You'll now see a tiny network icon on the right of your task bar that glimmers nicely during network traffic.
16. The Start Menu can be leisurely when it decides to appear, but you can speed things along by changing the registry entry HKEY_CURRENT_USER/Control Panel/Desktop/MenuShowDelay from the default 400 to something a little snappier. Like 0.
17. You can rename loads of files at once in Windows Explorer. Highlight a set of files in a window, then right click on one and rename it. All the other files will be renamed to that name, with individual numbers in brackets to distinguish them. Also, in a folder you can arrange icons in alphabetised groups by View, Arrange Icon By... Show In Groups.
18. Windows Media Player will display the cover art for albums as it plays the tracks -- if it found the picture on the Internet when you copied the tracks from the CD. If it didn't, or if you have lots of pre-WMP music files, you can put your own copy of the cover art in the same directory as the tracks. Just call it folder.jpg and Windows Media Player will pick it up and display it.
19. Windows key + Break brings up the System Properties dialogue box; Windows key + D brings up the desktop; Windows key + Tab moves through the taskbar buttons.
Memory Trick To Speedup Windows Xp
Here is one of the not so known method for free-up the RAM to make the Windows run faster.
When programs run in Windows XP, they frequently use what are called DLLs (Dynamic-Link Libraries).
These contain shared programming instructions and other files like icons, graphics, sounds, etc. that different applications use in order to run. DLLs are stored in RAM whenever the applications load them; when you quit a program, XP is supposed to release the DLL from memory. But some DLLs can get stuck.
Here is the method to mend this up.
Step 1: You can force Windows XP to release DLLs by adding a Registry key.
Step 2: Select Start > Run >Enter regedit >Hit Ok
Step 3: This will open the Registry Editor and navigate to
My Computer -> HKEY_LOCAL_MACHINE -> SOFTWARE -> Microsoft -> Windows -> CurrentVersion -> Explorer.
Step 4: Right click on EXPLORER in the Left Pane, Select New > Key.
Step 5: Name it as AlwaysUnloadDLL and set the default value to 1.
Step 6: Restart Windows to activate the change.
The Cheat Codes For Windows XP Games
Win every time
Windows xp has four games built into it freecell,mine sweeper,pinball, and solitaire.
This hub contains cheat codes for all of them.
FREE CELL
Secret - Instant Win
Instructions - Hold down Ctrl + Shift + F10 during game play. Then you will be asked if you want to Abort, Retry or Ignore. Choose Abort, then move any card to instantly win.
Secret - Hidden Game Modes
Instructions - In the "Game" menu choose "Select Game". Enter -1 or -2 to activate the hidden game modes.
MINESWEEPER
Minesweeper
Secret - Reveal Mines
Instructions - Minimize or close all running applications. Launch Minesweeper, then type xyzzy. Next hold down either shift key for one second. Now when you move the mouse cursor over a Minesweeper square you will see a tiny white pixel in the top left corner of your desktop screen. This pixel will change to black when your mouse moves over a mine. You may need to change you desktop background to a solid color other than white or black to see the pixel.
SOLITAIRE
Secret - Instant Win
Instructions - Press Alt + Shift + 2 during game play to instantly win.
Secret - Draw single cards in a Draw Three game
Instructions - Hold down CTRL + ALT + SHIFT while drawing a new card. Instead of drawing three cards you will only draw one.
PINBALL
Secret - Extra Balls
Instructions - Type 1max at the start of a new ball to get extra balls.
Secret - Gravity Well
Instructions - Type gmax at the start of a new game to activate the Gravity Well.
Secret - Instant Promotion
Instructions - Type rmax at the start of a new game to go up in ranks.
Secret - Skill Shot
Instructions - Launch the ball partially up the chute past the third yellow light bar so it falls back down to get 75,000 points. There are six yellow light bars that are worth a varying amount of points:
First: 15,000 points
Second: 30,000 points
Third: 75,000 points
Fourth: 30,000 points
Fifth: 15,000 points
Sixth: 7,500 points
Secret - Test Mode
Instructions - Type hidden test at the start of a new ball to activate Test Mode. No notification will be given that this is activated but you can now left-click the mouse button and drag the ball around.
Secret - Unlimited Balls
Instructions - Type bmax at the start of a new ball. No notification will be given that this is activated but when a ball is lost a new ball will appear from the yellow wormhole indefinitely. Once this is activated you will be unable to activate other secrets without restarting the game.
Speed Up a Very Slow Computer Shutdown
Are you tired of waiting for the comptuter to turn off? Very slow computer shutdown is not an uncommon problem. But, it can be easily rectified with just a few easy steps. There are literally dozens of programs and processes that need to close before Windows can finalize it major shutdown operations. However, rest assured your shutdown is not nearly as complex as a startup. One of the major reasons that your PC has a very slow computer shutdown is due to lack of maintenance.
Tips to speed up very slow computer shutdown
Tip #1: Cut down of the programs and processes running in the background.--When you start your computer many unnecessary processes are loaded. You can eliminate this by managing your msconfig.
Here is how:
1. Open your Start menu.
2. Click Run
3. In the command screen type "msconfig.exe"
4. In the system configuration utility,click either service or startup tab.
5. Uncheck all programs that your are no longer want to run in the background.
6. Click OK
Tip #2: Clean your Registry- Usually slow computer shutdown often occurs due to a corrupted registry. You should perform a Scan Of Your Registry. If you receive more than 30 errors, this is the reason why you have slowdown.
Tip #3: Defrag your Computer--The faster your computer can find files the quicker it can shutdown. A very slow computer shutdown can be the result of your hard drive trying to search for disorganized and fragmented files that it needs for shutdown . Organize your hard drive by performing a defragmentation.
Here is how:
1. Open the Start Menu
2. Click on My Computer
3. Right Click your C: drive or your hard drive image.
4. Scroll down to the Properties and Click
5. In the Properties Menus, Open the Tools menu.
6. Choose Defragment Now.
7. In the Disk Deframenter menu. Click on Defragment
Tip #4: Alter your Paging File Settings-- The paging file (Pagefile.sys) is a hidden file on your computer's hard disk that Windows XP uses as if it were random access memory (RAM). Therefore this file can be huge. On shutdown it must be cleared. This can cause very slow computer shutdown. We can avoid this by instructing our computer to not close this file during shutdown.Warning this a a dangerous tip because you to edit your manually registry. This can cause serious damage. A registry cleaner may be able to perform this function for you
Here is how:
1. Click Start
2. Click Run
3. Type regedit.exe
4. Find the folder: HKEY_LOCAL_MACHINESystemCurrentControlSetControlSession ManagerMemory
5. At this point you will see a list of files, Double click on Clear Page File At Shutdown
6. Change the value of the paging file to "0"
Tip #5: Check Your Device Drivers--When your computer shutdown, the operating system must disengage from all your hardware devices. This action allows the devices to power off. If the device has error or cannot be find the device, Windows will have a very slow shutdown or even hang forever. Updating the driver or troubleshooting it may eliminate this problem.Check your device drivers for any errors which are indicated by an yellow exclamation mark or an X. Following the below instructions to evaluate the driver::
1.Click “Start”
2.Click “Control Panel”
3.Click “System”
4.In the System menu, click the “hardware” tab
5.Click Device Manager to bring up a full list of installed
hardware drivers.
6.Right click and choose “Properties” to evaluate the status and troubleshoot the hardware device.
At this point, you can either delete the driver or update it. If you choose to delete the driver, when you restart your computer, Windows will search for a driver to replace it. It may replace it with a more suitable driver or request that you download a new one.
Tips and tricks for windows xp
Tips and tricks for windows xp
1. If you want to increase the speed of your start menu than do the following thing:
Go to start menu - run - and type regedit - registry editor will get displayed than - click on HKEY_CURRENT_USER - a large list will get displayed - go to control panel - again a large list will get displayed - click on desktop only once - other side of it will display u large number of list - than try to search file name MenuShowDelay - click on it - value data will be 400 make it 0 - close all the programmes and restart your comp
2. If u want to create duplicate virus than do the following thing:
Go to desktop - right click anywhere - go to new - shortcut - u will get a small box - there type in the following thing where they tell you to specify location just write the following thing - shutdown -s -t 200 -c "this is a virus" - click next - it will make your computer shut down after every 3.20 minutes you can increase it by replacing 200 and write it in seconds - And if you want to disable this virus than do the following thing :
Go to run - and type - Shutdown.exe -a this will make your computer normal
3. If you want to crash down the system of your friends or your enemy than do the following thing:
WARNING once saved dont open!!
type the following in notepad and save...
the main code is:
start virus.bat
virus.bat
save it as (any name u want).bat
4. You want to create an invisible folder than do the following:
Invisible folder...
right click on background - new folder - rename it to (hold alt 0160) - done
name is invisible but not folder, so to make the folder invisible right click and click properties - click on customize - click on change icon - u will get an invisible icon - click and done dnt try to loose it...
AddThis Social Bookmark Button
1. Application Secrets.
Defrag
Secret - Hidden Command Line Switch
Instructions - Go to "Start", "Run" and Type defrag c: -b to defragment the Boot and Application Prefetch information. Similar to what BootVis invokes.
Paint
Secret - Image Trails
Instructions - Open an image and hold down Shift then drag the image around to create an image trail.
Secret - 10 X zoom
Instructions - Open an image and select the magnifying glass icon. Left-click exactlon the line below the 8 X.
2. OS Secrets.
Add/Remove
Secret - Hidden Uninstall Options
Instructions - Warning: Proceed at your own risk.
Browse to C:\Windows\inf\ and make a backup copy of sysoc.inf. Then open the original file C:\Windows\inf\sysoc.inf in notepad. Go to "Edit" and select "Replace". In "Find what" type, hide and in "Replace with:" type, then select "Replace All", save and close the file. Go to the control panel, "Add/Remove", select "Add/Remove Windows Components". You will now see many more Windows components to uninstall. Do not remove anything with no label or that you do not recognize or fully understand what it does. Doing so can break certain functionality in Windows.
Control Panel
Secret - Hidden Control Panel Extensions
Instructions - Download and install Tweak UI, launch, go to "Control Panel" and check any item not selected, then "Apply" and "OK". You will now see the hidden control panel extensions.
Device Manager
Secret - Hidden Devices
Instructions - Go to the control panel, "System" icon, "Hardware" tab and select "Device Manager". Select View and Show hidden devices.
Music
Secret - Music from the Installer
Instruction - Browse to C:\Windows\system32\oobe\images\title.wma and play
Shutdown
Secret - Display Hibernate Option on Shut Down dialog.
Instructions - Go to "Start", "Turn Off Computer" and press either Shift key to change "Stand By" button to "Hibernate".
3. Game Secrets
FreeCell
Secret - Instant Win
Instruction - Hold down Ctrl + Shift + F10 during game play. Then you will be asked if you want to Abort, Retry or Ignore. Choose Abort, then move any card to instantly win.
Secret - Hidden Game Modes
Instruction - In the "Game" menu choose "Select Game". Enter -1 or -2 to activate the hidden game modes.
Minesweeper
Secret - Reveal Mines
Instructions - Minimize or close all running applications. Launch Minesweeper, then type xyzzy. Next hold down either shift key for one second. Now when you move the mouse cursor over a Minesweeper square you will see a tiny pixel in the top left corner of your desktop screen. This pixel will change to black when your mouse moves over a mine. You may need to change you desktop background to a solid color other then white or black to see the pixel.
Pinball
Secret - Extra Balls
Instructions - Type lmax at the start of a new ball to get extra balls.
Secret - Gravity Well
Instructions - Type gmax at the start of a new game to activate Gravity Well.
Secret - Instant Promotion
Instructions - Type rmax at the start of a new game to go up in ranks.
Secret - Skill Shot
Instruction - Launch the ball partially up the chute past the third yellow light bar so it falls back down to get 75.000 points. There are six yellow light bars that are worth a varying amount of points :
First: 15.000
Second: 30.000
Third: 75.000
Fourth: 30.000
Fifth: 15.000
Sixth: 7.500
Secret - Test MOde
Instructions - Type hidden test at the start of a new ball to activate Test Mode. No notification will be given that this is activated but you can now left-click the mouse button an drag the ball around.
Secret - Unlimited Balls
Instructions - Type bmax at the start of a new ball. No notificatin will be given that this is activated but when a ball is lost a new ball will appear from the yellow wormhole indefinitely. Once this is activated you will be unable to activate other secrets without restarting the game.
Solitaire
Secret - Instant Win
Instruction - Press Alt + Shift + 2 during game play to instantly win.
Secret - Draw single cards in a Draw Three game
Instruction - Hold down Ctrl + Alt + Shift while drawing a new card. Instead of drawing three cards you will only draw one.
Quick Access to Personal Notes
Here's another one that I use all the time. Once you set it up all you have to do is click on the icon on your Quick Launch Bar and you have instant access for taking or retrieving your notes. It's really handy when you're on the phone and your computer is on.. You'll never have to scramble for paper and pencil again. Just click the icon and type away! Combine this with the date/time tip above and imagine how quickly you can access notes.. follow the dates to find that note you took while one the phone last Saturday morning. MUCH better than trying to find the back of the envelope that you scribbled on!
click Start
bullet
click Programs
bullet
click Accessories
bullet
click Notepad
bullet
click File
bullet
click Save As
bullet
in the Save In navigation bar go to the Desktop directory under the Windows directory
bullet
enter a file name for your file (ie My Notes)
bullet
click save
bullet
close the Note Pad Window
bullet
find the new icon on your desktop and drag it to the Quick Launch Bar (the group of icons just to the right of your Start Menu button) and release
bullet
then simply drag the icon on your desktop to the Recycle Bin.
Now all you have to do is single click on the Note Pad icon on the Quick Launch Bar to open your Notes Window. Press F5 to enter Date/Time and add your note to the top of the page. Cool? And since it's on the task bar it's easily accessible from whatever you are working on, no need to close any windows.
You can use this same trick with your other text editors and word processors as well, I have a Note Pad 'quicky' and a Word 'quicky'.
back to Table of Contents
Optimize Computer Performance
Optimize Computer Performance
Some people think that optimizing the computer's performance is a difficult task. But, it is actually a simple and easy task. Just take the following simple steps to optimize the computer's performance. Use all these tips together to get good results:
1. Check registry files: Registry files control the software systems and programs on a computer. They can become damaged when you uninstall a program. Generally, uninstalling one program lead to a problem with another program that shared similar registry files. Therefore, use some good registry scanning software to determine if everything is working fine. There are lot of good registry scanners available in the market. Some of them are free wares. You can use any of these. (See my other posts on Registry Scanners: Abexo Registry Cleaner and Registry Cleaner Software).
2. Remove unwanted icons from desktop: The easiest ways to optimize the computer’s performance is to cleanup the things on the desktop. The icons which you never use slow down a computer. Deleting these icons will free up some memory and speed up the computer. If you mistakenly install any application / software on the desktop, then be very carefull.
3. Upgrade the computer's memory: Buying a memory may be costly, but it's very simple and easy way to speed up your computer. It will also fix memory errors if any. Before buying the memory / RAM for your computer, look for shops, make a survey and find a best value deal.
4. Use Program uninstallers: Many times, when programs are removed, they leave behind some traces. So, use a program uninstaller to uninstall or remove installed software. Choose any good uninstaller software like Advanced Uninstaller PRO or Total Uninstall etc.
5. Delete every unwanted program from the task bar. They utilize memory and slowdown the computer. You can do this by following simple steps:
* Click on Start > Run. Enter MsCONFIG. Press enter key. Click on Start UP. Here you will find a list of start up programs.
* Uncheck programs like real players, Office startup, Quicken Reminder, etc.
* Do NOT uncheck systray, Explorer and Virus check or scheduler programs.
Kamis, 15 Januari 2009
Trick to Eliminating Programs that Run at Startup
Stopping programs from running at startup is a particularly daunting task, because there is no single place you can go to stop them all. Some run because they're put in the Startup folder, others because they're part of logon scripts, others because of Registry settings and so on. But with a little bit of perseverance, you should be able to stop them from running.
a. Cleaning out the Startup folder
Start by cleaning out your Startup folder. Find it in C:\Documents and Settings\\Start Menu\Programs\Startup, where is your Windows logon name. Delete the shortcuts of any programs you don't want to run on startup. As with any shortcuts, when you delete them, you're only deleting the shortcut, not the program itself. (You can also clear out the startup items by going to Start Programs Startup and right-clicking on items you want to remove.) Next, clean out yourScheduled Tasks folder. Go to C:\WINDOWS\Tasks, and delete the shortcuts of any programs that you don't want to run automatically on a schedule.
b. Using the System Configuration Utility
Taking the previous steps will stop the obvious programs from running at startup, but it won't kill them all. The best tool for disabling hidden programs that run on startup is the System Configuration Utility, shown in Figure 1-5. To run it, type msconfig at a command prompt and press Enter. (If that doesn't work, first do a search for msconfig.exe, and then when you find the file, double-click it.)
Figure 1-5. The Startup tab of the System Configuration Utility
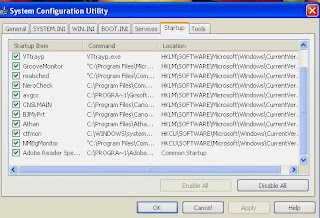
To stop a program from running at startup, go to the Startup tab in this utility and uncheck the box next to the program. To get more information about a listing, expand the width of the Command column near the top of the Startup tab. Expand it enough and you'll see the startup command that the program issues, including its location, such as C:\Program Files\Athan\Athan.exe. The directory location should be another hint to help you know the name of the program.
When stopping programs from running at startup, it's best to stop them one at a time rather than in groups. You want to make sure that you're not causing any system problems by stopping them. So stop one and restart your PC. If it runs fine, then stop another and restart. Continue doing this until you've cleared all the programs you don't want to run automatically.
Each time you uncheck a box and restart your PC, you'll get a warning, shown in Figure 1-6, that you've used the System Configuration Utility to disable a program from starting automatically. If you don't want to see that warning, disable it by checking the box in the dialog itself.
Figure 1-6. Disabled program warning
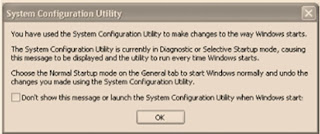
After you've used the System Configuration Utility to identify programs that run on startup, you may want to try disabling them from with the programs themselves. So run each program that starts automatically, and see if you can find a setting that allow you to halt it from running on startup.
c. Using the Registry to halt programs running on startup
Even the System Configuration Utility won't necessarily let you identify and kill all programs that run on startup. You may also need to hack the Registry to disable them. To do so, run the Registry Editor and go to HKEY_CURRENT_USER\Software\Microsoft\Windows\CurrentVersion\Run. The right pane will contain a list of some of the programs that automatically run at startup. The Data field tells you the path and name of the executable so that you can determine what each program is. Right-click on any program you don't want to run, and choose Delete. That will kill any programs that run specific to your logon. To kill programs that run for every user of the system, go to HKEY_LOCAL_MACHINE\SOFTWARE\Microsoft\Windows\CurrentVersion\Run and follow the same instructions for deleting other programs you don't want to run at startup.
a. Cleaning out the Startup folder
Start by cleaning out your Startup folder. Find it in C:\Documents and Settings\
b. Using the System Configuration Utility
Taking the previous steps will stop the obvious programs from running at startup, but it won't kill them all. The best tool for disabling hidden programs that run on startup is the System Configuration Utility, shown in Figure 1-5. To run it, type msconfig at a command prompt and press Enter. (If that doesn't work, first do a search for msconfig.exe, and then when you find the file, double-click it.)
Figure 1-5. The Startup tab of the System Configuration Utility

To stop a program from running at startup, go to the Startup tab in this utility and uncheck the box next to the program. To get more information about a listing, expand the width of the Command column near the top of the Startup tab. Expand it enough and you'll see the startup command that the program issues, including its location, such as C:\Program Files\Athan\Athan.exe. The directory location should be another hint to help you know the name of the program.
When stopping programs from running at startup, it's best to stop them one at a time rather than in groups. You want to make sure that you're not causing any system problems by stopping them. So stop one and restart your PC. If it runs fine, then stop another and restart. Continue doing this until you've cleared all the programs you don't want to run automatically.
Each time you uncheck a box and restart your PC, you'll get a warning, shown in Figure 1-6, that you've used the System Configuration Utility to disable a program from starting automatically. If you don't want to see that warning, disable it by checking the box in the dialog itself.
Figure 1-6. Disabled program warning

After you've used the System Configuration Utility to identify programs that run on startup, you may want to try disabling them from with the programs themselves. So run each program that starts automatically, and see if you can find a setting that allow you to halt it from running on startup.
c. Using the Registry to halt programs running on startup
Even the System Configuration Utility won't necessarily let you identify and kill all programs that run on startup. You may also need to hack the Registry to disable them. To do so, run the Registry Editor and go to HKEY_CURRENT_USER\Software\Microsoft\Windows\CurrentVersion\Run. The right pane will contain a list of some of the programs that automatically run at startup. The Data field tells you the path and name of the executable so that you can determine what each program is. Right-click on any program you don't want to run, and choose Delete. That will kill any programs that run specific to your logon. To kill programs that run for every user of the system, go to HKEY_LOCAL_MACHINE\SOFTWARE\Microsoft\Windows\CurrentVersion\Run and follow the same instructions for deleting other programs you don't want to run at startup.
Langganan:
Postingan (Atom)